HEATING / AIR CONDITIONING AIR CONDITIONING UNIT REMOVAL
PROCEDURE

 1. PRECAUTION (for Automatic Air Conditioning System)
- NOTICE:
-
Make sure to select face mode before disconnecting the cable from the negative (-) battery terminal.
2.RECOVER REFRIGERANT FROM REFRIGERATION SYSTEM
88707
3.DISCONNECT SUCTION PIPE SUB-ASSEMBLY
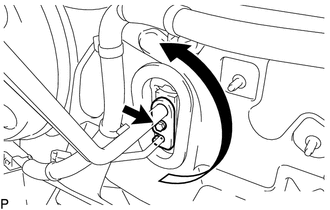
Remove the bolt and rotate the hook connector as shown in the illustration.
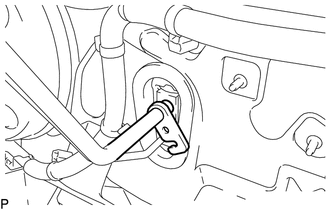
Disconnect the suction pipe sub-assembly.
Remove the O-ring from the suction pipe sub-assembly.
- NOTICE:
-
Seal the openings of the disconnected parts using vinyl tape to prevent entry of moisture and foreign matter.
88710
4.DISCONNECT AIR CONDITIONER TUBE ASSEMBLY
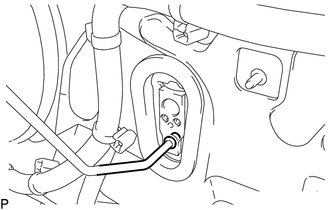
Disconnect the air conditioner tube assembly.
Remove the O-ring from the air conditioner tube assembly.
- NOTICE:
-
Seal the openings of the disconnected parts using vinyl tape to prevent entry of moisture and foreign matter.
87246
5.DISCONNECT HEATER WATER OUTLET HOSE
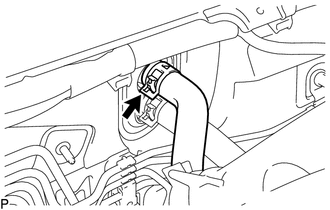
Using pliers, grip the claws of the clip and slide the clip to disconnect the heater water outlet hose.
- NOTICE:
- ·
Do not apply excessive force to the heater water outlet hose.
- ·
Prepare a drain pan or cloth in case the coolant leaks.
87245
6.DISCONNECT HEATER WATER INLET HOSE
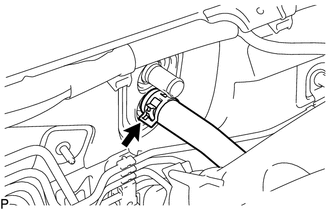
Using pliers, grip the claws of the clip and slide the clip to disconnect the heater water inlet hose.
- NOTICE:
- ·
Do not apply excessive force to the heater water inlet hose.
- ·
Prepare a drain pan or cloth in case the coolant leaks.
55303B
7.REMOVE LOWER INSTRUMENT PANEL SUB-ASSEMBLY
8.REMOVE STEERING COLUMN ASSEMBLY
89650
9.REMOVE POWER STEERING ECU ASSEMBLY
85940
10.REMOVE WINDSHIELD WIPER RELAY ASSEMBLY (w/ Rain Sensor)
11.REMOVE INSTRUMENT PANEL JUNCTION BLOCK ASSEMBLY WITH MAIN BODY ECU
88625Q
12.REMOVE COOLER (ROOM TEMP. SENSOR) THERMISTOR (for Automatic Air Conditioning System)
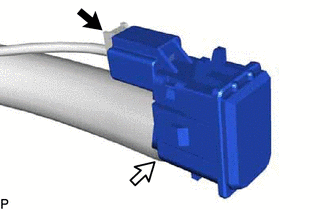
Disconnect the connector and air conditioning duct sub-assembly to remove the cooler (room temp. sensor) thermistor.
55950G
13.REMOVE DEFROSTER NOZZLE ASSEMBLY
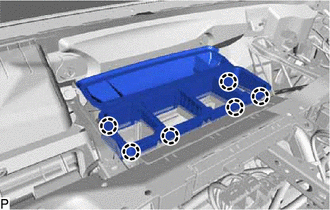
Disengage the 6 claws and remove the defroster nozzle assembly.
55343B
14.REMOVE CENTER INSTRUMENT PANEL TO COWL BRACE
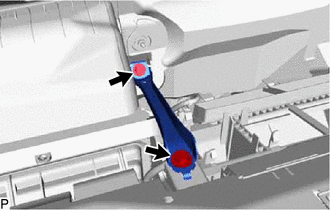
Remove the 2 bolts and center instrument panel to cowl brace.
82141
15.DISCONNECT INSTRUMENT PANEL WIRE
Remove the 2 bolts (A) and disconnect the ground portion of the wire harness protector cover and earth wire.
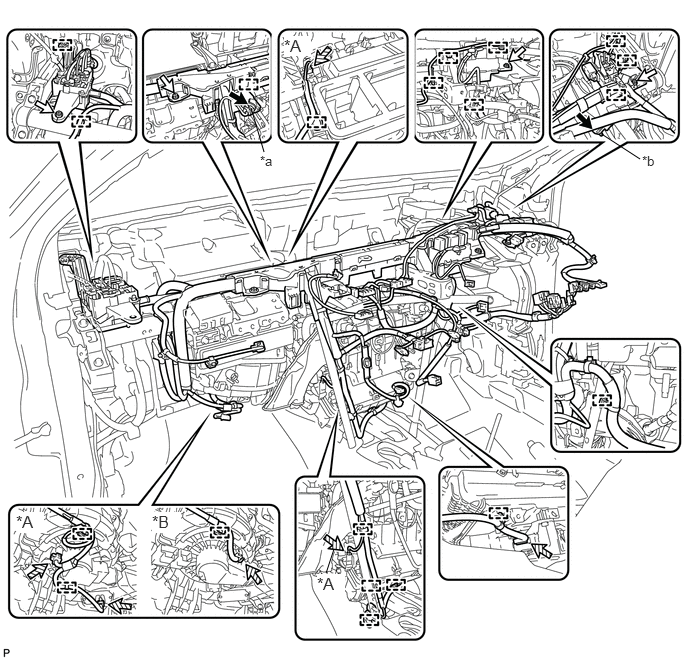
| *A | for Manual Air Conditioning System | *B | for Automatic Air Conditioning System |
| *a | Ground Portion of Wire Harness Protector Cover | *b | Earth Wire |

|
Bolt (A) | 
|
Bolt (B) |

|
Connector | - | - |
Remove the 4 bolts (B).
Disconnect each connector.
Disengage each clamp and disconnect the instrument panel wire.
55306A
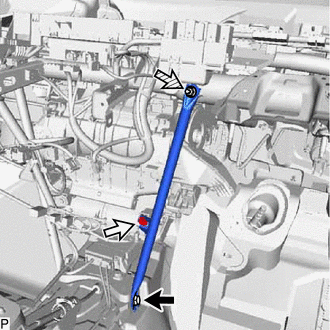
16.REMOVE NO. 1 INSTRUMENT PANEL BRACE SUB-ASSEMBLY
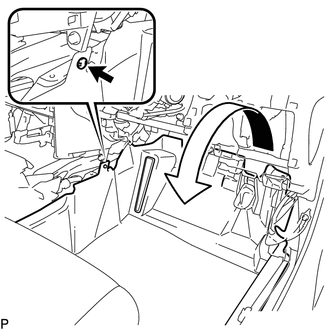
Using a clip remover, remove the clip.
Turn back the front floor carpet assembly as shown in the illustration.
|
|
Bolt |
|
|
Screw |
|
|
Nut |
Remove the bolt, screw, nut and No. 1 instrument panel brace sub-assembly.
55306A
17.REMOVE NO. 2 INSTRUMENT PANEL BRACE SUB-ASSEMBLY
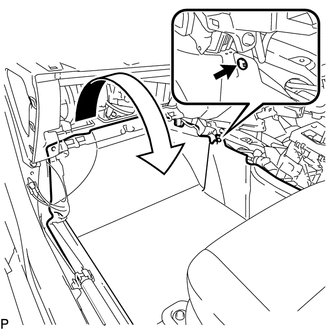
Using a clip remover, remove the clip.
Turn back the front floor carpet assembly as shown in the illustration.
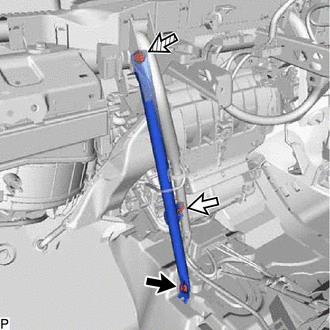
|
|
Bolt |
|
|
Screw |
|
|
Nut |
Remove the bolt, screw, nut and No. 2 instrument panel brace sub-assembly.
55331
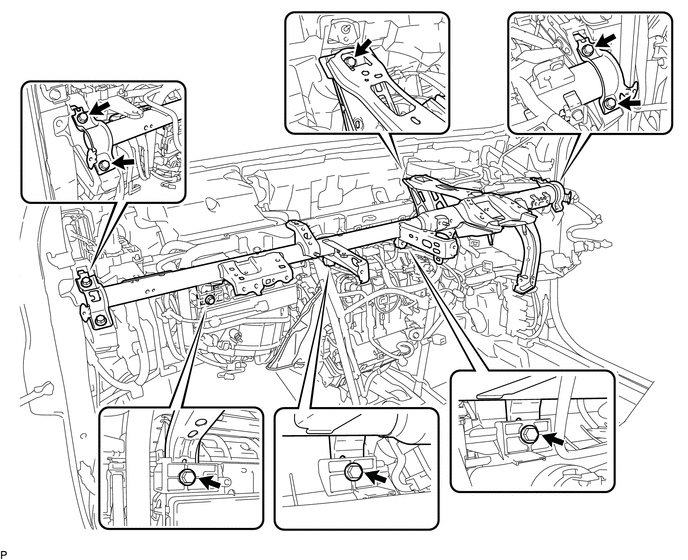
18.REMOVE INSTRUMENT PANEL REINFORCEMENT
Remove the 8 bolts and instrument panel reinforcement.
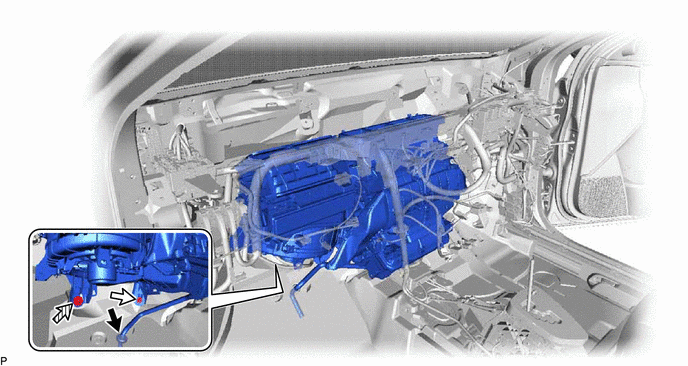
19.REMOVE AIR CONDITIONER UNIT ASSEMBLY
Disconnect the drain cooler hose.
|
|
Bolt |
|
Nut |
Remove the bolt, nut and air conditioner unit assembly.
87211
20.REMOVE NO. 1 AIR DUCT
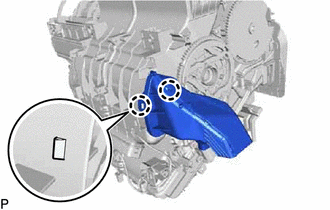
Disengage the 2 claws and remove the No. 1 air duct.
- NOTICE:
-
If any of the claws of the No. 1 air duct have been cracked or deformed during removal, make sure to replace the No. 1 air duct with a new one. Failure to do so may cause the No. 1 air duct to fall off or noise to occur.
87211A
21.REMOVE NO. 2 AIR DUCT
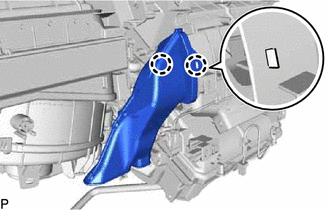
Disengage the 2 claws and remove the No. 2 air duct.
- NOTICE:
-
If any of the claws of the No. 2 air duct have been cracked or deformed during removal, make sure to replace the No. 2 air duct with a new one. Failure to do so may cause the No. 2 air duct to fall off or noise to occur.
87050
22.REMOVE AIR CONDITIONING RADIATOR ASSEMBLY
for Automatic Air Conditioning System:
Disconnect the connector.
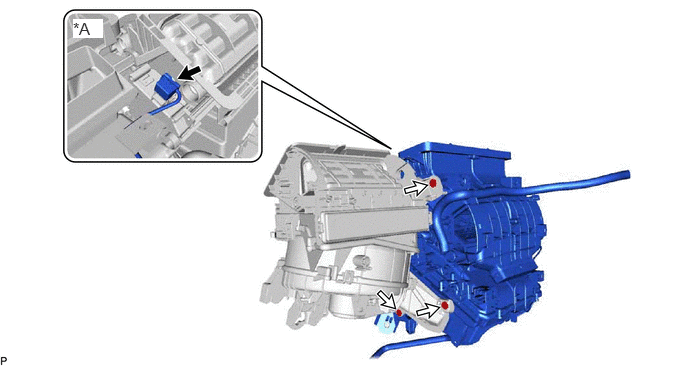
| *A | for Automatic Air Conditioning System | - | - |
Remove the 3 screws and air conditioning radiator assembly.
88505
23.REMOVE AIR CONDITIONING DUCT SUB-ASSEMBLY (for Automatic Air Conditioning System)
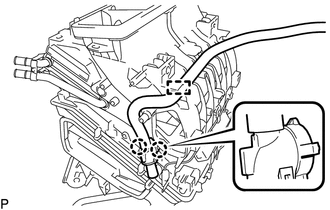
Disengage the clamp.
Disengage the 2 claws to remove the air conditioning duct sub-assembly.
55389A
24.REMOVE CONSOLE MOUNTING BRACKET LH
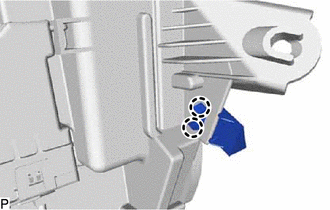
Disengage the 2 claws to remove the console mounting bracket LH.
55388C
25.REMOVE CONSOLE MOUNTING BRACKET RH
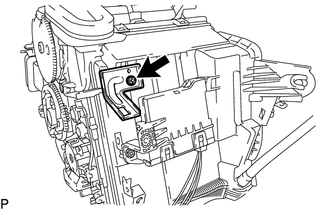
Remove the screw and console mounting bracket RH.
88650N
26.REMOVE AIR CONDITIONING AMPLIFIER ASSEMBLY (for Manual Air Conditioning System)
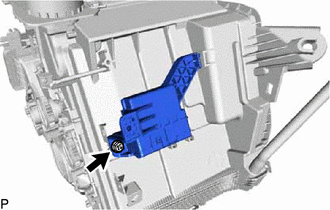
Remove the screw.
Remove the air conditioning amplifier assembly as shown in the illustration.
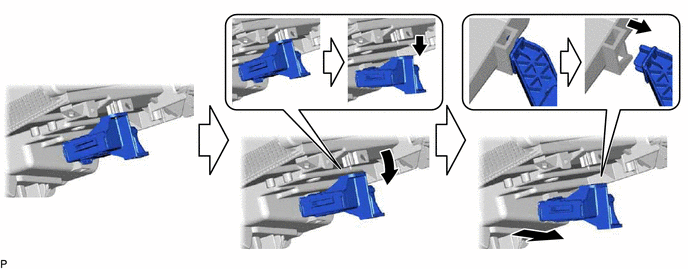
88650N
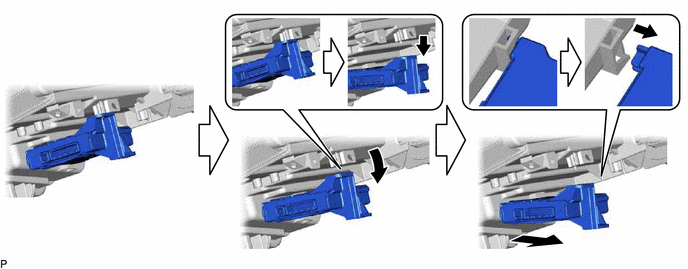
27.REMOVE AIR CONDITIONING AMPLIFIER ASSEMBLY (for Automatic Air Conditioning System)
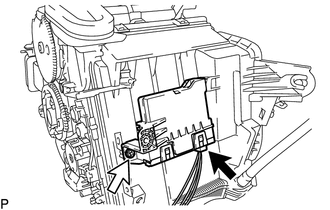
Disconnect the connector.
Remove the screw.
Remove the air conditioning amplifier assembly as shown in the illustration.
88539J
28.REMOVE DRAIN COOLER HOSE
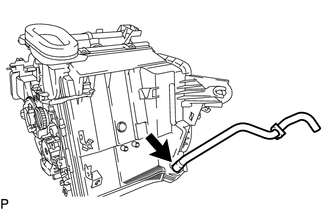
Remove the drain cooler hose.
82210K
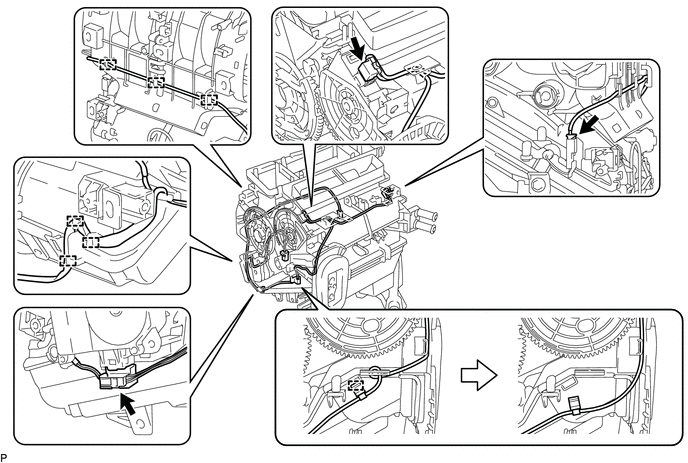
29.REMOVE AIR CONDITIONING HARNESS ASSEMBLY (for Automatic Air Conditioning System)
Disengage each clamp.
Disconnect each connector.
Remove the air conditioning harness assembly as shown in the illustration.