INTERIOR PANELS / TRIM UPPER INSTRUMENT PANEL REMOVAL
PROCEDURE

 1. PRECAUTION
Click hereVehicle Interior>INTERIOR PANELS / TRIM>UPPER INSTRUMENT PANEL>PRECAUTION
- NOTICE:
-
After turning the ignition switch off, waiting time may be required before disconnecting the cable from the negative (-) battery terminal. Therefore, make sure to read the disconnecting the cable from the negative (-) battery terminal notices before proceeding with work.
-
Click hereGeneral>INTRODUCTION>REPAIR INSTRUCTION>PRECAUTION

 2.DISCONNECT CABLE FROM NEGATIVE BATTERY TERMINAL
- CAUTION:
-
Wait at least 90 seconds after disconnecting the cable from the negative (-) battery terminal to disable the SRS system.
- NOTICE:
-
When disconnecting the cable, some systems need to be initialized after the cable is reconnected.
-
Click hereGeneral>INTRODUCTION>REPAIR INSTRUCTION>INITIALIZATION

 55012A
3.REMOVE NO. 2 INSTRUMENT PANEL GARNISH SUB-ASSEMBLY
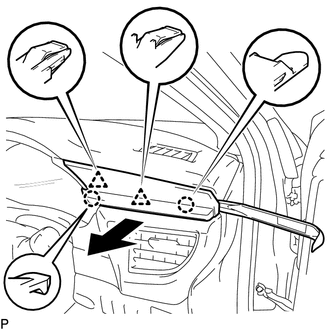
Using a moulding remover, disengage the 2 claws and 2 clips, and remove the No. 2 instrument panel garnish sub-assembly as shown in the illustration.

 62311B
4.DISCONNECT FRONT DOOR OPENING TRIM WEATHERSTRIP RH
Disconnect the front door opening trim weatherstrip RH.

 55317A
5.REMOVE INSTRUMENT SIDE PANEL RH
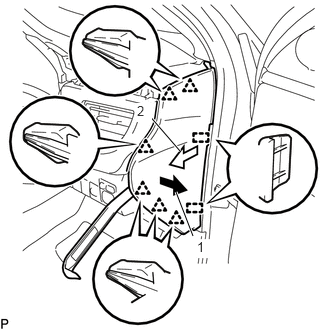
Using a moulding remover, disengage the 6 clips in the direction indicated by the arrow (1) as shown in the illustration.
Pull the instrument side panel RH in the direction indicated by the arrow (2) as shown in the illustration to disengage the 2 guides and remove the instrument side panel RH.

 55650
6.REMOVE NO. 1 INSTRUMENT PANEL REGISTER ASSEMBLY
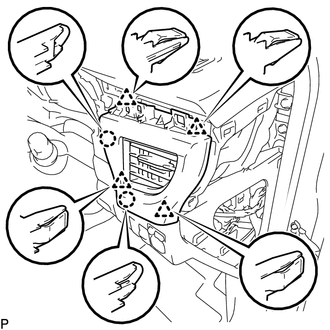
Disengage the 2 claws and 4 clips, and remove the No. 1 instrument panel register assembly.

 55011A
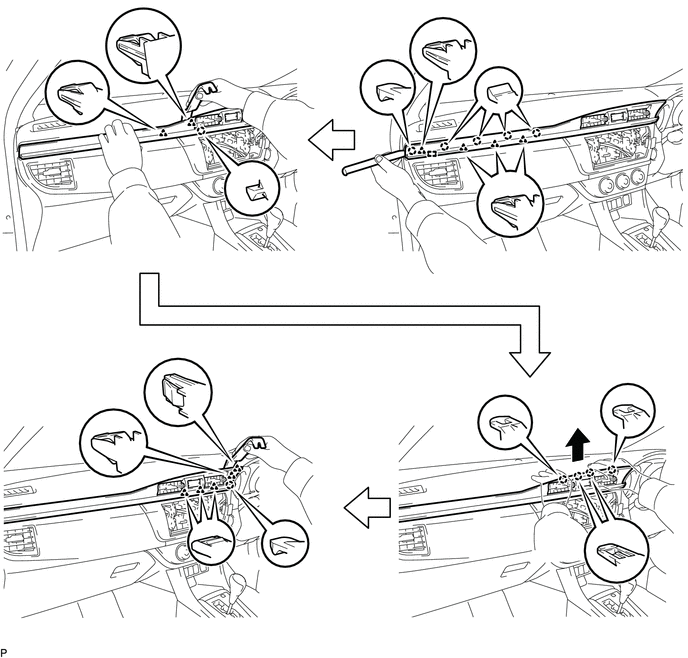
7.REMOVE NO. 1 INSTRUMENT PANEL GARNISH SUB-ASSEMBLY
Using a moulding remover, disengage the 11 claws, 11 clips and guide, and remove the No. 1 instrument panel garnish sub-assembly as shown in the illustration.

 55405B
8.REMOVE CENTER INSTRUMENT CLUSTER FINISH PANEL SUB-ASSEMBLY
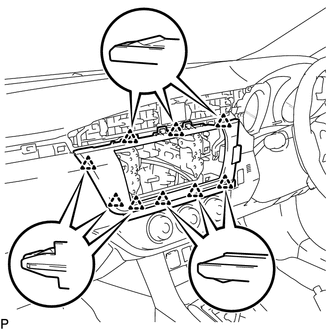
Disengage the 9 clips.
Disconnect the connector and remove the center instrument cluster finish panel sub-assembly.

 55410C
9.REMOVE INSTRUMENT CLUSTER FINISH PANEL ASSEMBLY
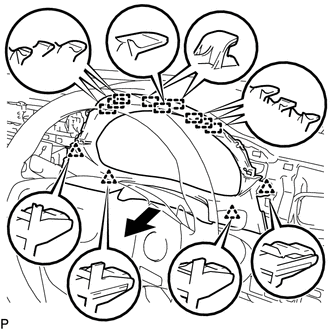
Disengage the 4 clips and 9 guides, and remove the instrument cluster finish panel assembly as shown in the illustration.

 83100
10.REMOVE COMBINATION METER ASSEMBLY

 62312B
11.DISCONNECT FRONT DOOR OPENING TRIM WEATHERSTRIP LH
Disconnect the front door opening trim weatherstrip LH.

 55318C
12.REMOVE INSTRUMENT SIDE PANEL LH
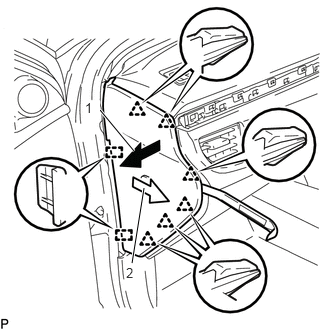
Using a moulding remover, disengage the 6 clips in the direction indicated by the arrow (1) as shown in the illustration.
Pull the instrument side panel LH in the direction indicated by the arrow (2) as shown in the illustration to disengage the 2 guides and remove the instrument side panel LH.

 13.REMOVE NO. 2 INSTRUMENT PANEL REGISTER SUB-ASSEMBLY
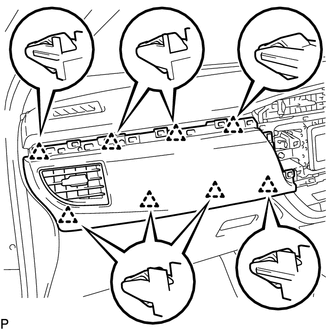
Disengage the 8 clips and remove the No. 2 instrument panel register sub-assembly.

 62211U
14.REMOVE FRONT PILLAR GARNISH ASSEMBLY RH

 62212B
15.REMOVE FRONT PILLAR GARNISH ASSEMBLY LH
- HINT:
-
Use the same procedure as for the RH side.

 82142A
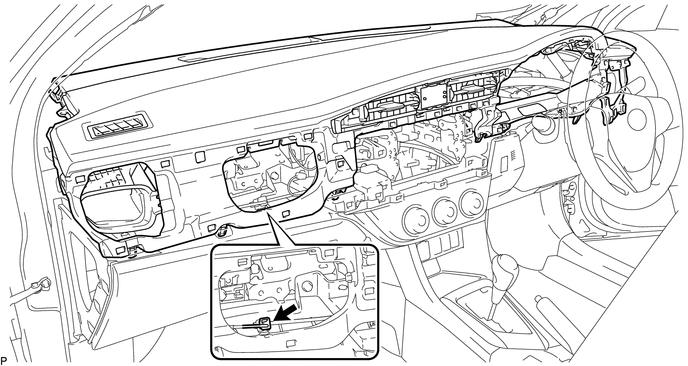
16.DISCONNECT NO. 2 INSTRUMENT PANEL WIRE (w/ Front Passenger Airbag)

 17.REMOVE UPPER INSTRUMENT PANEL ASSEMBLY
Disconnect the connector.
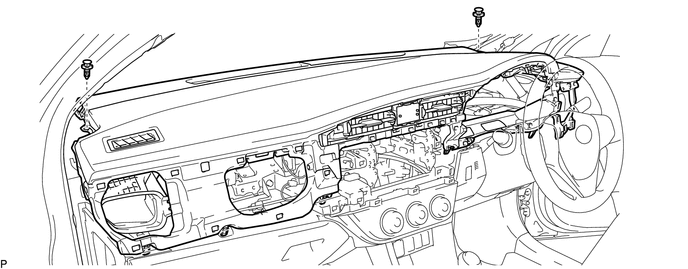
w/o Front Passenger Airbag:
Remove the 2 clips.
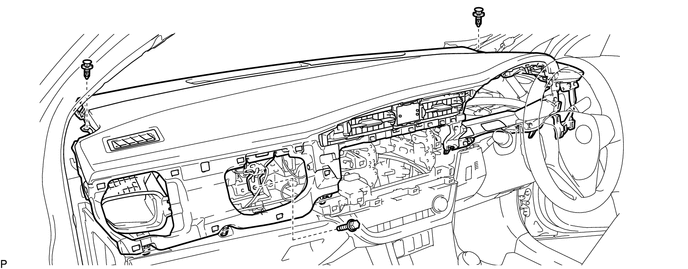
w/ Front Passenger Airbag:
Remove the bolt <A> and 2 clips.
Pull the upper instrument panel assembly in the direction indicated by the arrow (1) as shown in the illustration to disengage the 6 clips.
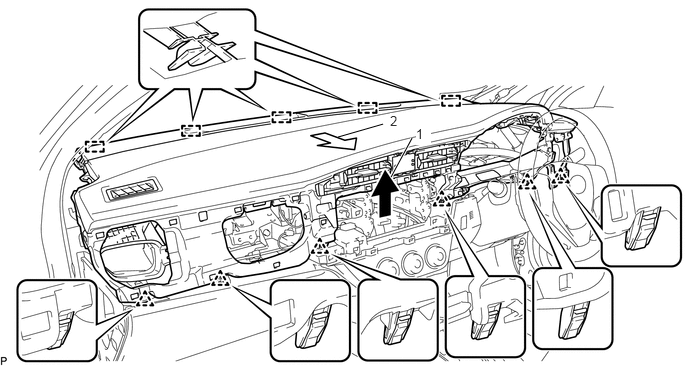
Pull the upper instrument panel assembly in the direction indicated by the arrow (2) as shown in the illustration to disengage the 5 guides and remove the upper instrument panel assembly.