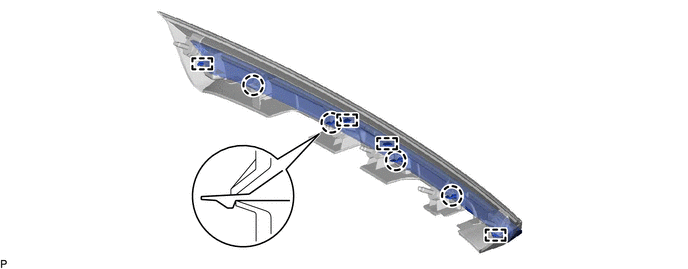
EXTERIOR PANELS / TRIM LUGGAGE COMPARTMENT DOOR OUTSIDE GARNISH REMOVAL
PROCEDURE

 1.REMOVE REAR LIGHT ASSEMBLY LH
2.REMOVE REAR LIGHT ASSEMBLY RH
- HINT:
-
Use the same procedure as for the LH side.
76801A
3.REMOVE LUGGAGE COMPARTMENT DOOR OUTSIDE GARNISH SUB-ASSEMBLY (w/o Lock Cylinder)
w/ Smart Entry and Start System:
Disconnect the connector.
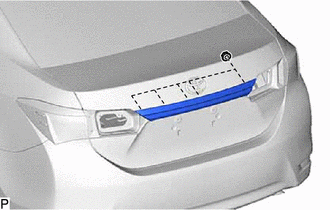
Remove the 5 nuts.
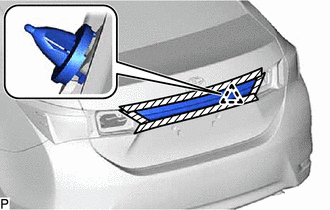

|
Protective Tape |
Apply protective tape around the luggage compartment door outside garnish sub-assembly as shown in the illustration.
Disengage the clip to remove the luggage compartment door outside garnish sub-assembly.
Remove the clip from the luggage compartment door outside garnish sub-assembly.
Remove the 5 gaskets from the luggage compartment door outside garnish sub-assembly.
w/o Smart Entry and Start System:
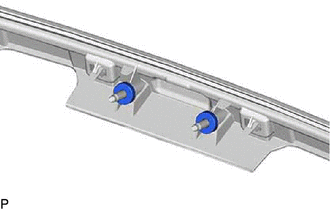
Remove the 2 No. 1 back door garnish retainers from the luggage compartment door outside garnish sub-assembly.
Remove the 2 gaskets from the luggage compartment door outside garnish sub-assembly.
76801A
4.REMOVE LUGGAGE COMPARTMENT DOOR OUTSIDE GARNISH SUB-ASSEMBLY (w/ Lock Cylinder)
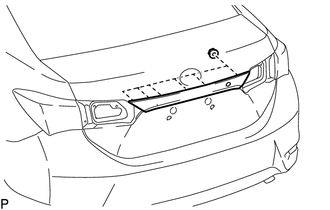
Remove the 6 nuts.
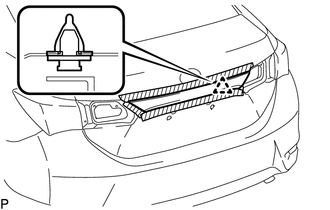
|
|
Protective Tape |
Apply protective tape around the luggage compartment door outside garnish sub-assembly as shown in the illustration.
Disengage the clip to remove the luggage compartment door outside garnish sub-assembly.
Remove the clip from the luggage compartment door outside garnish sub-assembly.
Remove the 6 gaskets from the luggage compartment door outside garnish sub-assembly.
84945
5.REMOVE LUGGAGE ELECTRICAL KEY SWITCH (w/o Lock Cylinder)
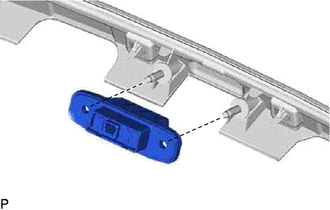
w/ Smart Entry and Start System:
Remove the luggage electrical key switch.
76821A
6.REMOVE LUGGAGE COMPARTMENT DOOR OUTSIDE GARNISH PROTECTOR
Remove the luggage compartment door outside garnish protector.
76812B
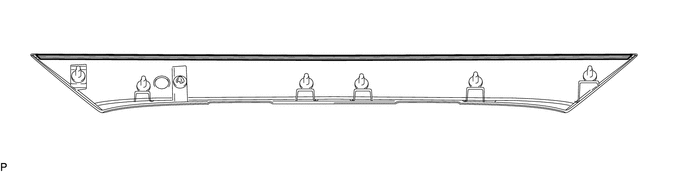
7.REMOVE NO. 2 LUGGAGE COMPARTMENT DOOR OUTSIDE GARNISH (w/o Lock Cylinder)
Remove the 2 screws.
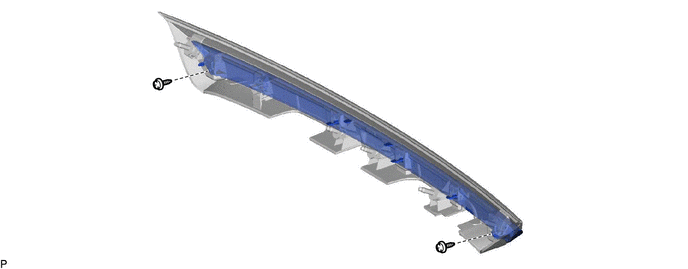
Disengage the 4 claws and 4 guides to remove the No. 2 luggage compartment door outside garnish.