2ZR-FE INTAKE / EXHAUST INTAKE MANIFOLD INSTALLATION
PROCEDURE

 1.INSTALL STUD BOLT (w/ Stud Bolt)
- HINT:
-
If a stud bolt is deformed or the threads are damaged, replace it.
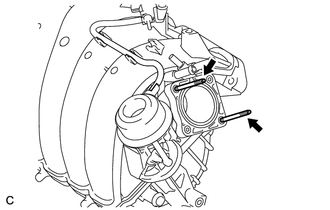
Using an E6 "TORX" socket wrench, install the 2 stud bolts to the intake manifold.
- Torque:
- 5.0 N*m (51 kgf*cm, 44 in.*lbf)
17111
2.INSTALL INTAKE MANIFOLD
Install the engine cover joint to the intake manifold.
- Torque:
- 8.0 N*m (82 kgf*cm, 71 in.*lbf)
Install a new No. 1 intake manifold to head gasket to the intake manifold.
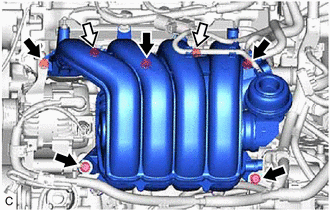

|
Bolt |

|
Nut |
Temporarily install the intake manifold and intake manifold stay with the 5 bolts and 2 nuts.
Tighten the 5 bolts and 2 nuts to the specified torque in several steps.
- Torque:
- 28 N*m (286 kgf*cm, 21 ft.*lbf)
Connect the ventilation hose to the intake manifold and slide the clip to secure it.
Connect the No. 1 vacuum transmitting hose to the intake manifold and slide the clip to secure it.
Connect the No. 1 fuel vapor feed hose and No. 3 air hose to the intake manifold.
Install the vacuum sensor bracket with the engine cover joint.
- Torque:
- 8.0 N*m (82 kgf*cm, 71 in.*lbf)
Connect the No. 2 air hose and No. 1 vacuum switching valve assembly (for ACIS) connector.
Engage the 3 wire harness clamps.
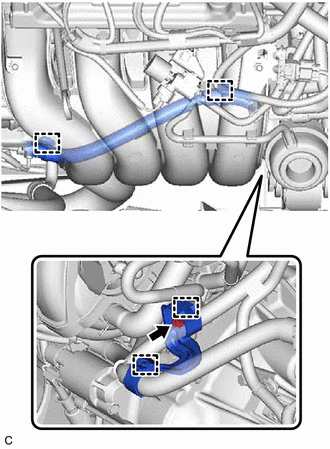
Install the wire harness clamp bracket with the bolt.
- Torque:
- 15 N*m (153 kgf*cm, 11 ft.*lbf)
Engage the 4 wire harness clamps.
89421
3.INSTALL VACUUM SENSOR (E.F.I. VACUUM SENSOR ASSEMBLY)
22210
4.INSTALL THROTTLE BODY ASSEMBLY