SEAT BELT FRONT SEAT OUTER BELT ASSEMBLY REMOVAL
CAUTION / NOTICE / HINT
- HINT:
- ·
Use the same procedure for the RH side and LH side.
·The following procedure is for the RH side.
PROCEDURE

 1. PRECAUTION
- NOTICE:
-
After turning the ignition switch off, waiting time may be required before disconnecting the cable from the negative (-) battery terminal. Therefore, make sure to read the disconnecting the cable from the negative (-) battery terminal notices before proceeding with work.
-
Click hereGeneral>INTRODUCTION>REPAIR INSTRUCTION>PRECAUTION
2.DISCONNECT CABLE FROM NEGATIVE BATTERY TERMINAL
- CAUTION:
-
Wait at least 90 seconds after disconnecting the cable from the negative (-) battery terminal to disable the SRS system.
67913
3.REMOVE FRONT DOOR SCUFF PLATE
62311B
4.DISCONNECT FRONT DOOR OPENING TRIM WEATHERSTRIP
Disconnect the front door opening trim weatherstrip.
67917A
5.REMOVE REAR DOOR SCUFF PLATE
62331A
6.DISCONNECT REAR DOOR OPENING TRIM WEATHERSTRIP
Disconnect the rear door opening trim weatherstrip.
73233
7.REMOVE LAP BELT OUTER ANCHOR COVER
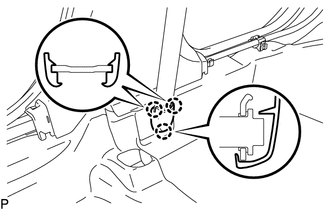
Disengage the 3 claws to remove the lap belt outer anchor cover.
73210
8.DISCONNECT FRONT SEAT OUTER BELT ASSEMBLY
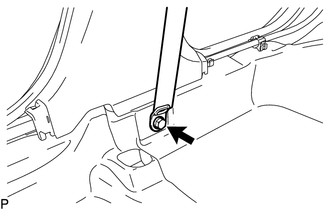
Remove the bolt to disconnect the floor anchor of the front seat outer belt assembly.
62413A
9.REMOVE CENTER PILLAR LOWER GARNISH
62410A
10.REMOVE CENTER PILLAR GARNISH ASSEMBLY
73210
11.REMOVE FRONT SEAT OUTER BELT ASSEMBLY
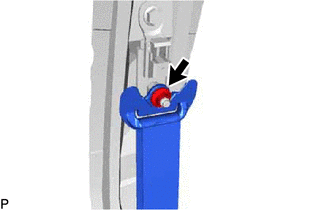
Remove the nut and disconnect the shoulder anchor of the front seat outer belt assembly.
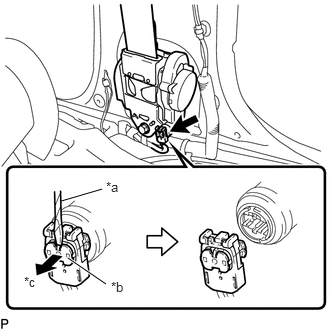
| *a | Protective Tape |
| *b | Locking Button |
| *c | Release |
Using a screwdriver, pull out the locking button to release the lock and disconnect the pretensioner connector as shown in the illustration.
- HINT:
-
Tape the screwdriver tip before use.
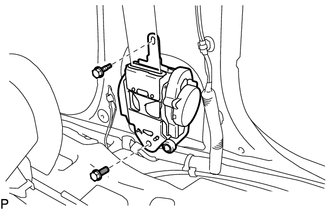
Remove the 2 bolts and front seat outer belt assembly.
73200A
12.REMOVE FRONT SHOULDER BELT ANCHOR ADJUSTER ASSEMBLY
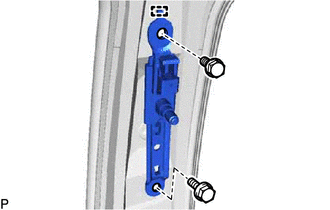
Remove the 2 bolts.
Disengage the guide to remove the front shoulder belt anchor adjuster assembly.