LIGHTING (INT) ROOM LIGHT INSTALLATION
PROCEDURE

 81240B
1.INSTALL NO. 1 ROOM LIGHT BULB (for Slide Switch Type)
81240B
1.INSTALL NO. 1 ROOM LIGHT BULB (for Slide Switch Type)
Install the No. 1 room light bulb to the room light switch base.
81240
2.INSTALL NO. 1 ROOM LIGHT ASSEMBLY (for Slide Switch Type)
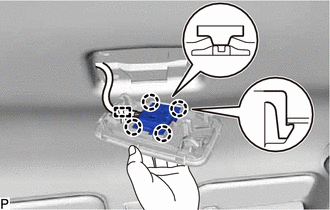
| *a | Switch Part of Room Light Switch Base |
| *b | Switch Part of No. 1 Room Light Housing |
Align the switch parts as shown in the illustration and engage the 4 claws to install the room light switch base to the No. 1 room light housing.
Engage the clamp.
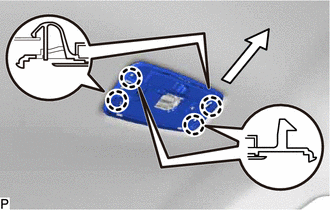
| *a | Front |
Engage the 4 claws to install the No. 1 room light housing.
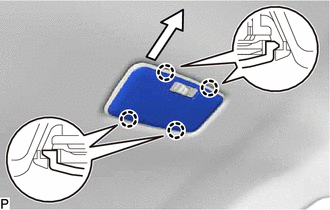
| *a | Front |
Engage the 4 claws to install the No. 1 room light lens.
81240B
3.INSTALL NO. 1 ROOM LIGHT BULB (for Push Switch Type)
Install the 2 No. 1 room light bulbs to the No. 1 room light housing.
81251B
4.INSTALL REAR ROOM LIGHT LENS RH (for Push Switch Type)
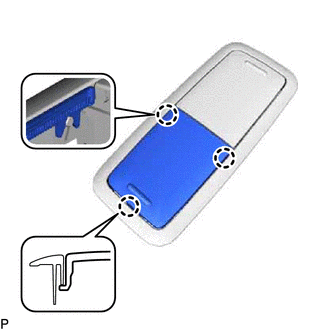
Engage the 3 claws to install the rear room light lens RH.
81291A
5.INSTALL REAR ROOM LIGHT LENS LH (for Push Switch Type)
- HINT:
-
Use the same procedure as for the RH side.
81250
6.INSTALL NO. 2 ROOM LIGHT ASSEMBLY (for Push Switch Type)
Connect the connector.
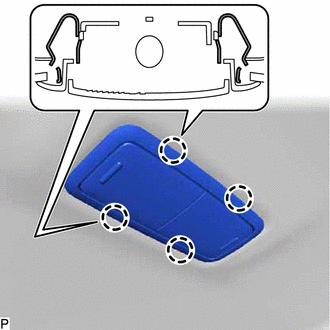
Engage the 4 claws to install the No. 2 room light assembly.