WIPER / WASHER FRONT WIPER MOTOR REMOVAL
PROCEDURE

 85292B
1.REMOVE FRONT WIPER ARM HEAD CAP
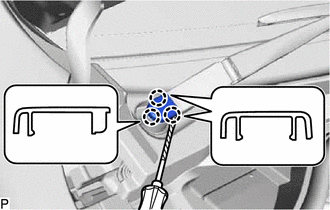
| *a | Protective Tape |
Using a screwdriver, disengage the 3 claws and remove the front wiper arm head cap.
- HINT:
- ·
Tape the screwdriver tip before use.
·Use the same procedure for the RH side and LH side.
2.REMOVE WINDSHIELD WIPER ARM AND BLADE ASSEMBLY RH
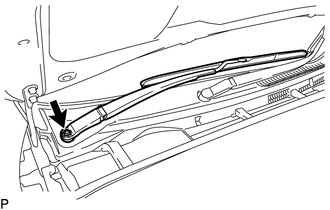
Remove the nut and windshield wiper arm and blade assembly RH.
3.REMOVE WINDSHIELD WIPER ARM AND BLADE ASSEMBLY LH
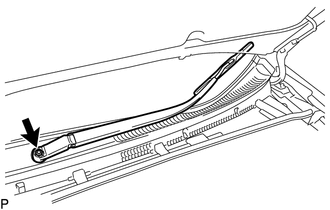
Remove the nut and windshield wiper arm and blade assembly LH.
53821A
4.REMOVE FRONT NO. 1 SIDE PANEL PROTECTOR RH
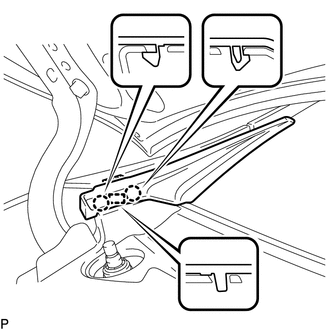
Disengage the 2 claws and guide.
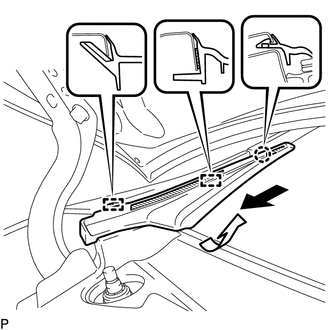

|
Double-sided Tape |
Separate the double-sided tape, disengage the claw and 2 guides and remove the front No. 1 side panel protector RH as shown in the illustration.
53822A
5.REMOVE FRONT NO. 1 SIDE PANEL PROTECTOR LH
- HINT:
-
Use the same procedure as for the RH side.
53155C
6.REMOVE NO. 1 RADIATOR GRILLE SEAL (for RH Side)
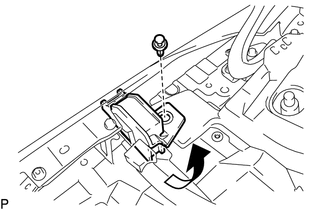
Remove the clip.
Remove the No. 1 radiator grille seal as shown in the illustration.
53155C
7.REMOVE NO. 1 RADIATOR GRILLE SEAL (for LH Side)
- HINT:
-
Use the same procedure as for the RH side.
55781E
8.REMOVE COWL TOP VENTILATOR LOUVER SUB-ASSEMBLY
Remove the 2 clips.
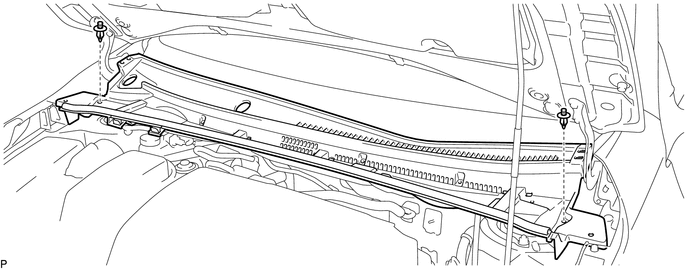
Disengage the 6 claws and 3 guides as shown in the illustration.
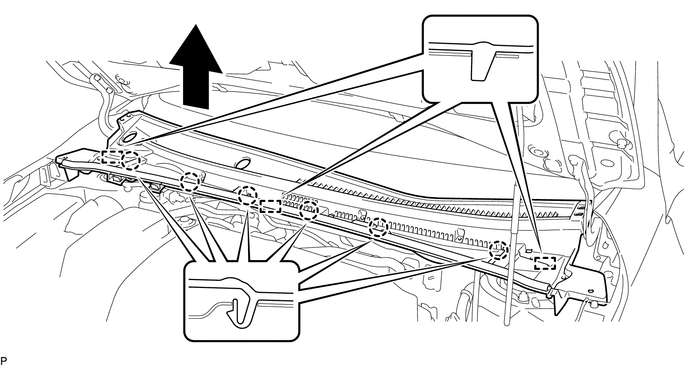
Disengage the 8 guides and remove the cowl top ventilator louver sub-assembly as shown in the illustration.
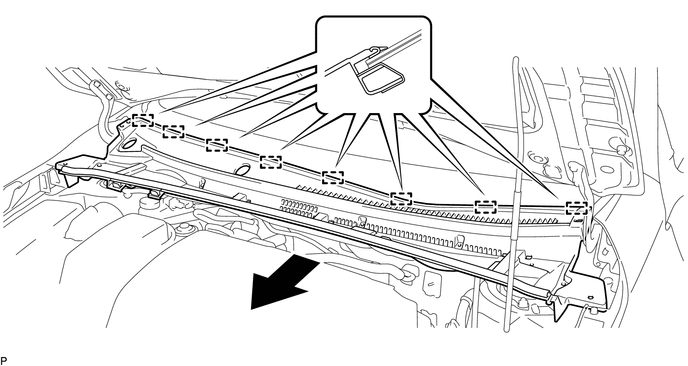
9.REMOVE WINDSHIELD WIPER MOTOR AND LINK ASSEMBLY
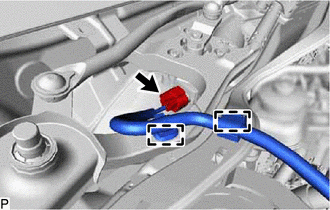
Disconnect the connector.
Disengage the 2 clamps.
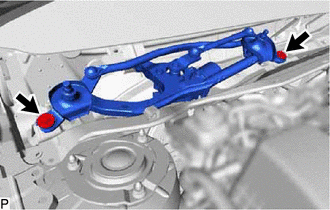
Remove the 2 bolts.
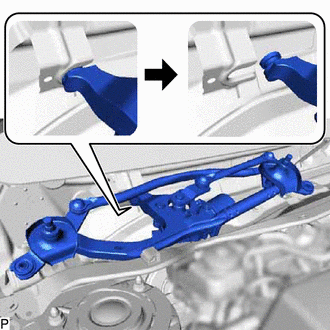
| *a | Motor Grommet |
Disengage the motor grommet as shown in the illustration and remove the windshield wiper motor and link assembly.
- NOTICE:
-
Be careful not to damage the windshield glass when removing the windshield wiper motor and link assembly.
85110
10.REMOVE WINDSHIELD WIPER MOTOR ASSEMBLY
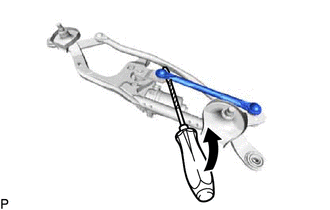
| *a | Protective Tape |
| *b | Pivot of the windshield wiper motor assembly |
| *c | No. 1 Windshield Wiper Link Rod |
Using a screwdriver, separate the No. 1 windshield wiper link rod from the pivot of the windshield wiper motor assembly as shown in the illustration.
- HINT:
-
Tape the screwdriver tip before use.
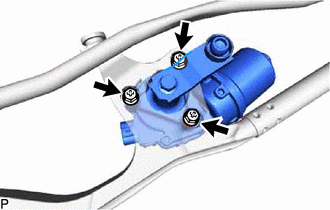
Remove the 3 bolts and windshield wiper motor assembly from the windshield wiper link assembly.
- HINT:
-
If the windshield wiper motor assembly cannot be removed from the windshield wiper link assembly, turn the crank arm so that the windshield wiper motor assembly can be removed.